Deploy Microservices in Kubernetes
Now that we have a good understanding of kubernetes and related AWS services, let's deploy a few microservices in our EKS kubernetes cluster.
Prerequisite
To follow this tutorial, you'll require a domain and, additionally, an SSL certificate for the domain and its subdomains.
- Register a Route 53 Domain
Go to AWS Console and register a Route 53 domain. You can opt for a cheaper TLD (top level domain) such as .link
!!! note It usually takes about 10 minutes but it might take about an hour for the registered domain to become available.
- Request a Public Certificate
Visit AWS Certificate Manager in AWS Console and request a public certificate for your domain and all the subdomains. For example, if you registered for a domain example.com then request certificate for example.com and *.example.com
!!! note Make sure you request the certificate in the region where your EKS cluster is in.
- Validate the Certificate
Validate the requested certificate by adding CNAME records in Route 53. It is a very simple process. Go to the certificate you created and click on Create records in Route 53. The CNAMEs will be automatically added to Route 53.
!!! note It usually takes about 5 minutes but it might take about an hour for the certificate to be ready for use.
Now that you have everything you need, let's move on to the demonstration.
Docker Images
Here are the Docker Images used in this tutorial:
!!! note 1. reyanshkharga/nodeapp:mongo is a Node.js backend application that uses MongoDB to store and retrieve data.
    Environment Variables:

    - `MONGODB_URI` (Required)
    - `POD_NAME` (Optional)

    Tha app has the following routes:

    - `GET /` Returns a JSON object containing `Host` and `Version`. If the `POD_NAME` environment variable is set, the value of the `Host` will be the value of the variable.
    - `GET /health` Returns health status of the app
    - `GET /random` Returns a randomly generated number between 1 and 10
    - `GET /books` Returns the list of books
    - `POST /addBook` Adds a book
    - `POST /updateBook` Updates the `copies_sold` value for the given book `id`.
    - `POST /deleteBook` Deletes the book record that matches the given id.

    Sample body for `POST /addBook`:

    ```json
    {
      "id": 1,
      "title": "Book1",
      "copies_sold": 0
    }
    ```

    Sample body for `POST /updateBook`:

    ```json
    {
      "id": 1,
      "copies_sold": 100
    }
    ```

    Sample body for `POST /deleteBook`:

    ```json
    {
      "id": 1
    }
    ```
2. `reyanshkharga/reactapp:v1` is a React application. It's a frontend application that interacts with `reyanshkharga/nodeapp:mongo` backend to perform the CRUD operation.

    Environment variables:

    - `REACT_APP_API_ENDPOINT` (Optional)

    The environment variable `REACT_APP_API_ENDPOINT` is optional. If provided, you will be able to do the CRUD operations.

3. `mongo:5.0.2` is MongoDB database. Our backend will use it to store and retrieve data to perform CRUD operations.
Objective
We are going to deploy the following microservices on our EKS kubernetes cluster:
MongoDB Database microservice: uses docker imagemongo:5.0.2Node.js Backend microservice: uses docker imagereyanshkharga/nodeapp:mongoReact Frontend microservice: uses docker imagereyanshkharga/reactapp:v1
The following diagram illustrates the communication between microservices:
graph LR
  A(Frontend) ---> B(Backend);
  B -..-> C[(Database)];
Note
We will use the same load balancer for both backend and frontend microservices because using more load balancers will be expensive since load balancers are charged hourly. We can achieve this using IngressGroup.
Step 1: Deploy MongoDB Database Microservice
Let's create the kubernetes objects for our MongoDB database microservice as follows:
Assuming your folder structure looks like the one below:
|-- manifests
|   |-- mongodb
│   |   |-- 00-namespace.yml
│   |   |-- deployment-and-service.yml
│   |   |-- storageclass.yml
│   |   |-- pvc.yml
Let's apply the manifests to create the kubernetes objects for MongoDB database microservice:
This will create the following kubernetes objects:
- A namespace named
mongodb - A
StorageClass(SC) for dynamic provisioning of persistent volume - A
PersistentVolumeClaim(PVC) in themongodbnamespace - MongoDB deployment in the
mongodbnamespace - MongoDB service in the
mongodbnamespace
Note
The order in which yaml files are applied doesn't matter since every relation except namespace is handled by label selectors, so it fixes itself once all resources are deployed.
We are using Amazon EBS to persist the MongoDB data. EBS is provisioned dynamically using AWS EBS-CSI driver.
With persistent volume even if the MongoDB pod goes down the data will remain intact. When the new pod comes up we'll have the access to the same data.
Verify if the resources were created successfully:
# List all resources in mongodb namespace
kubectl get all -n mongodb

# List StorageClass
kubectl get sc

# List PersistentVolume
kubectl get pv

# List PersistenvVolumeClaim
kubectl get pvc -n mongodb
Verify if MongoDB is working as expected:
# Start a shell session inside the mongodb container
kubectl exec -it <mongodb-pod-name> -n mongodb -- bash

# Start the mongo Shell to interact with MongoDB
mongo

# List Databases
show dbs

# Switch to a Database
use <db-name>

# List collections
show collections
Step 2: Deploy Node.js Backend Microservice
Let's create the kubernetes objects for our Node.js backend microservice as follows:
Assuming your folder structure looks like the one below:
|-- manifests
|   |-- backend
│   |   |-- 00-namespace.yml
│   |   |-- deployment-and-service.yml
│   |   |-- ingress.yml
Let's apply the manifests to create the kubernetes objects for Node.js backend microservice:
This will create the following kubernetes objects:
- A namespace named
backend - Backend deployment in the
backendnamespace - Backend service in the
backendnamespace - Ingress for backend service
The ingress creates an internet-facing load balancer and the SSL certificate is attached to the load balancer.
Note that the certificate is automatically discovered with hostnames from the ingress resource. Also, a Route 53 record is added for the host. This is all done by the AWS Load Balancer Controller and ExternalDNS.
Verify if the resources were created successfully:
# List all resources in backend namespace
kubectl get all -n backend

# List ingress in backend namespace
kubectl get ing -n backend
Go to AWS console and verify if the load balancer was created and a record was added to Route 53 for the host specified in ingress.
Open any browser on your local host machine and hit the URL to access the backend service:
Note
In real world it is best to have authorization and authentication in place for the backend services that is accessible on the internet. But for the sake of simplicity we have not used any authorization or authentication for the backend service.
Step 3: Deploy React Frontend Microservice
Let's create the kubernetes objects for our React frontend microservice as follows:
Assuming your folder structure looks like the one below:
|-- manifests
|   |-- frontend
│   |   |-- 00-namespace.yml
│   |   |-- deployment-and-service.yml
│   |   |-- ingress.yml
Let's apply the manifests to create the kubernetes objects for React frontend microservice:
This will create the following kubernetes objects:
- A namespace named
frontend - Frontend deployment in the
frontendnamespace - Frontend service in the
frontendnamespace - Ingress for frontend service
The ingress creates an internet-facing load balancer and the SSL certificate is attached to the load balancer.
Note that the certificate is automatically discovered with hostnames from the ingress resource. Also, a Route 53 record is added for the host. This is all done by the AWS Load Balancer Controller and ExternalDNS.
Note
The frontend microservice uses the API provided by the backend microservice to perform the CRUD operations.
Verify if the resources were created successfully:
# List all resources in frontend namespace
kubectl get all -n frontend

# List ingress in frontend namespace
kubectl get ing -n frontend
Go to AWS console and verify if the load balancer was created and a record was added to Route 53 for the host specified in ingress.
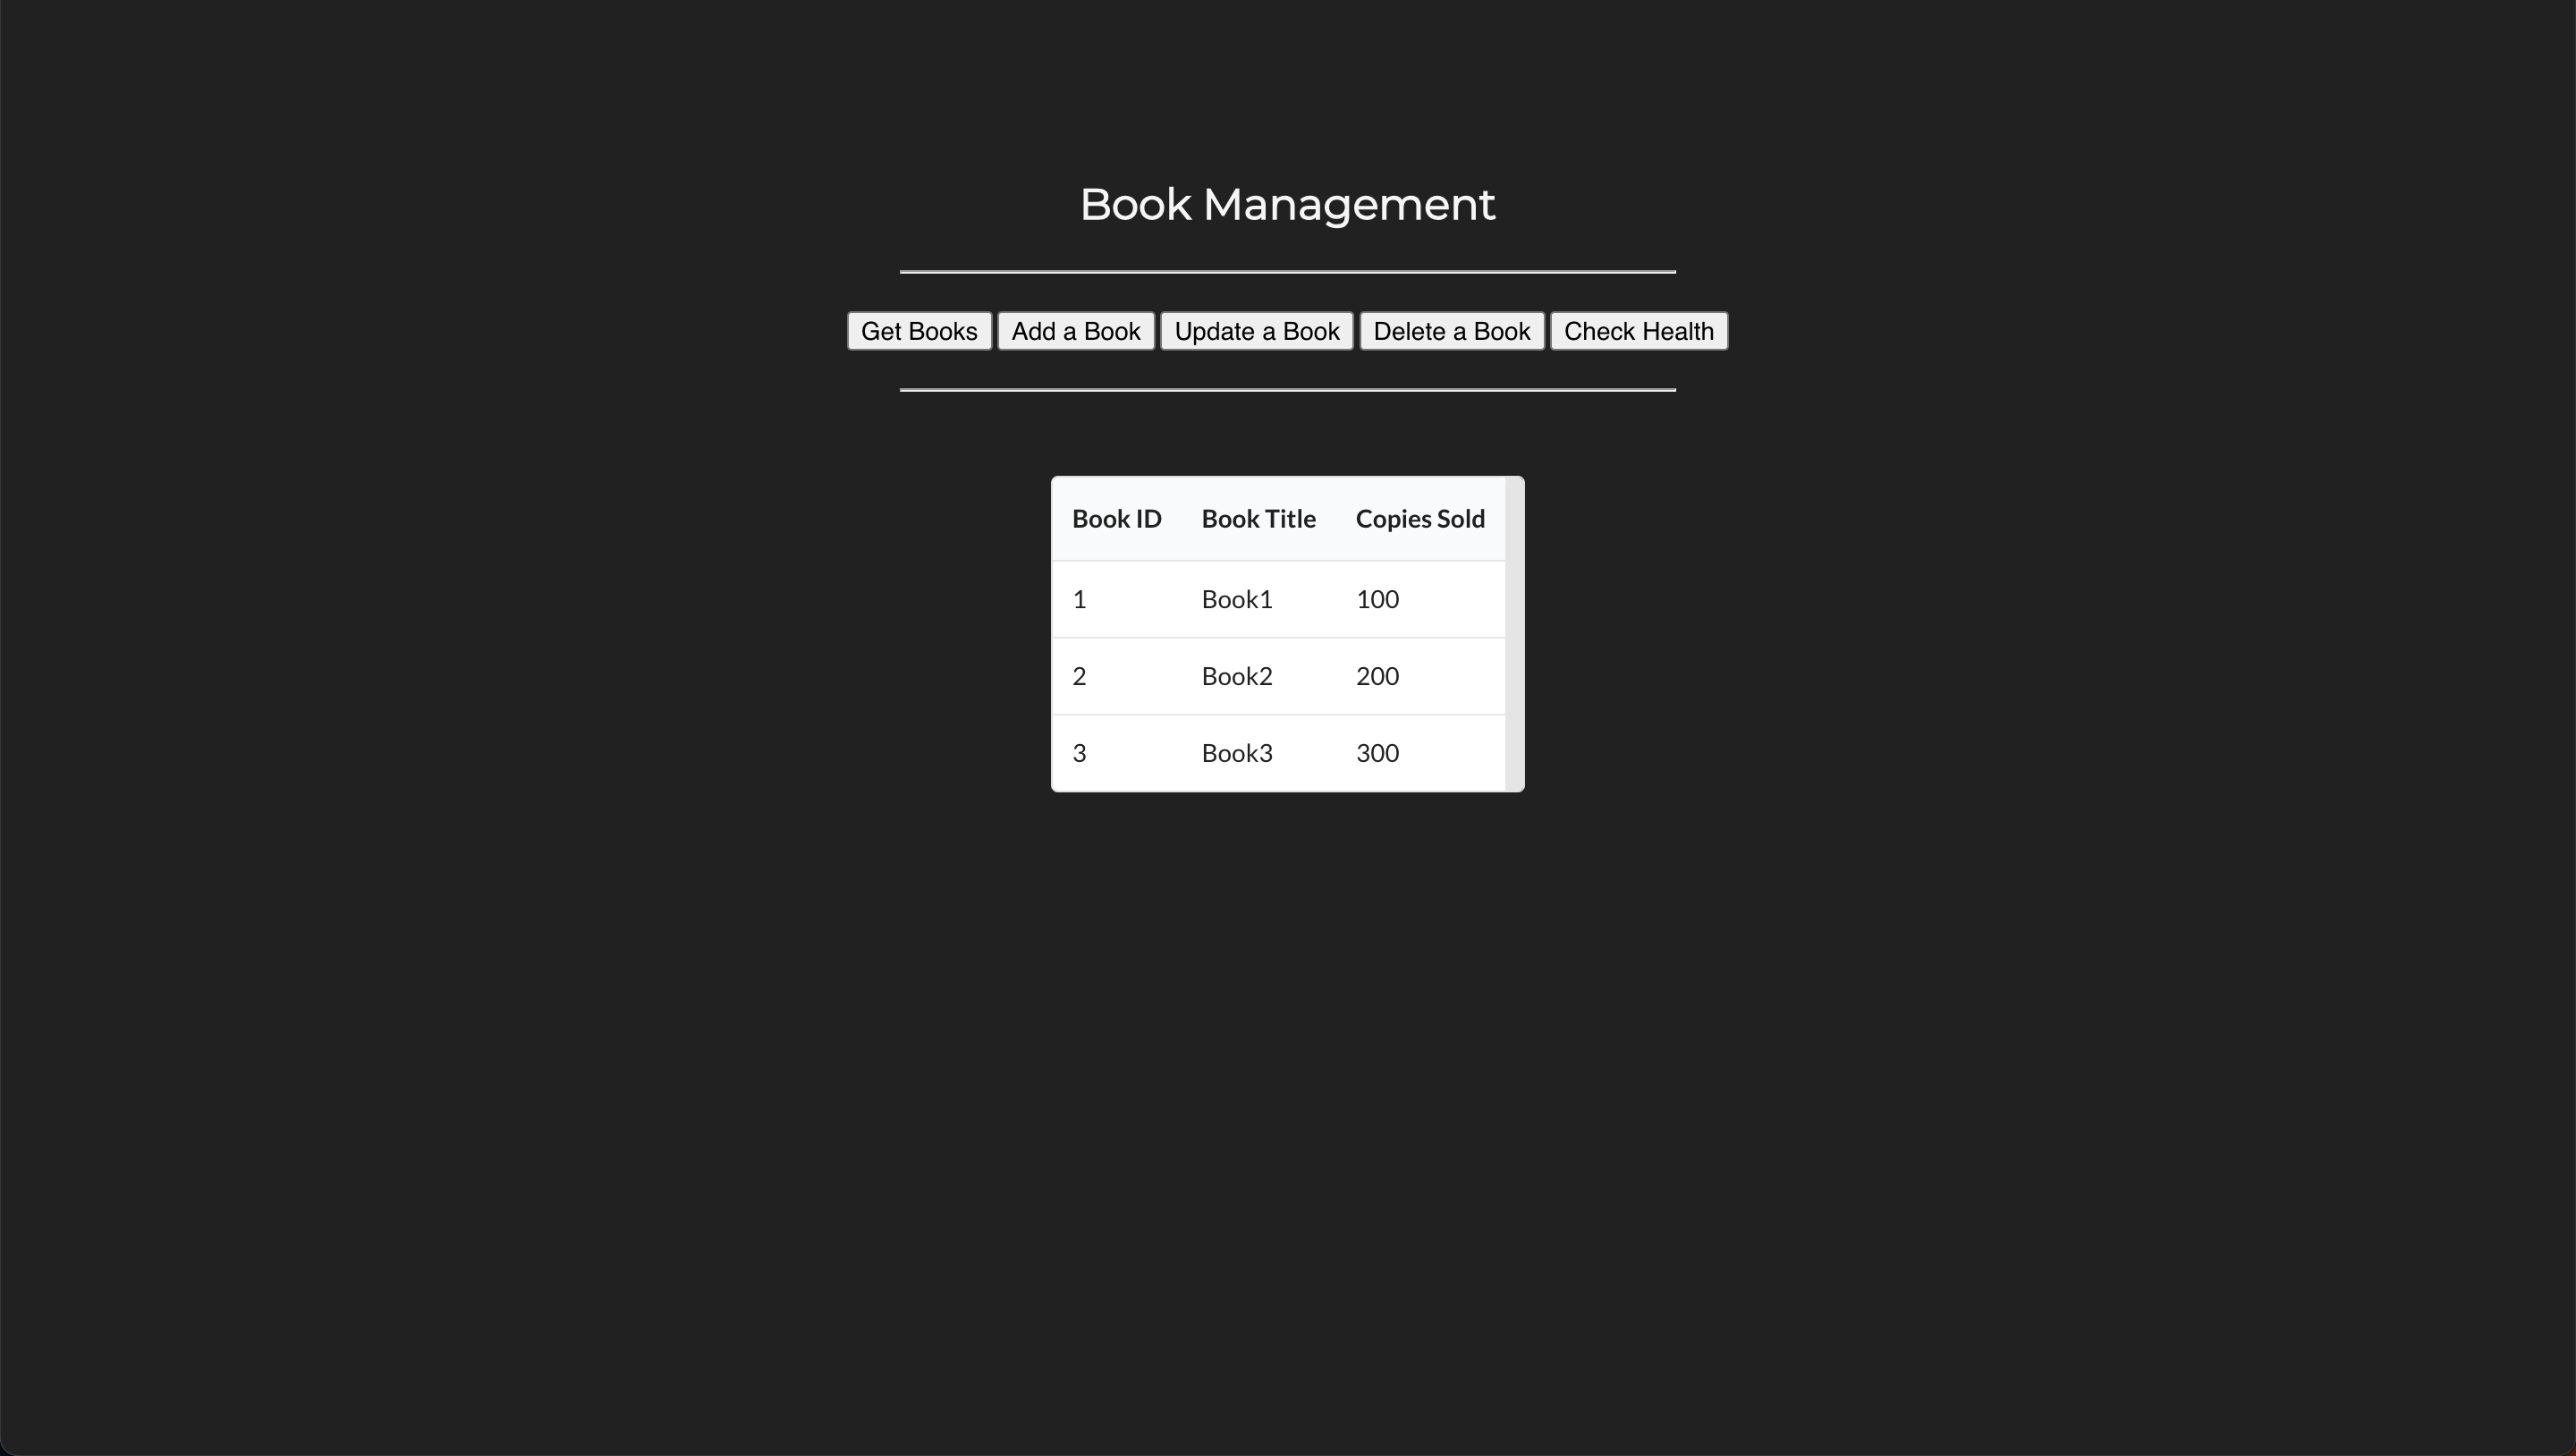
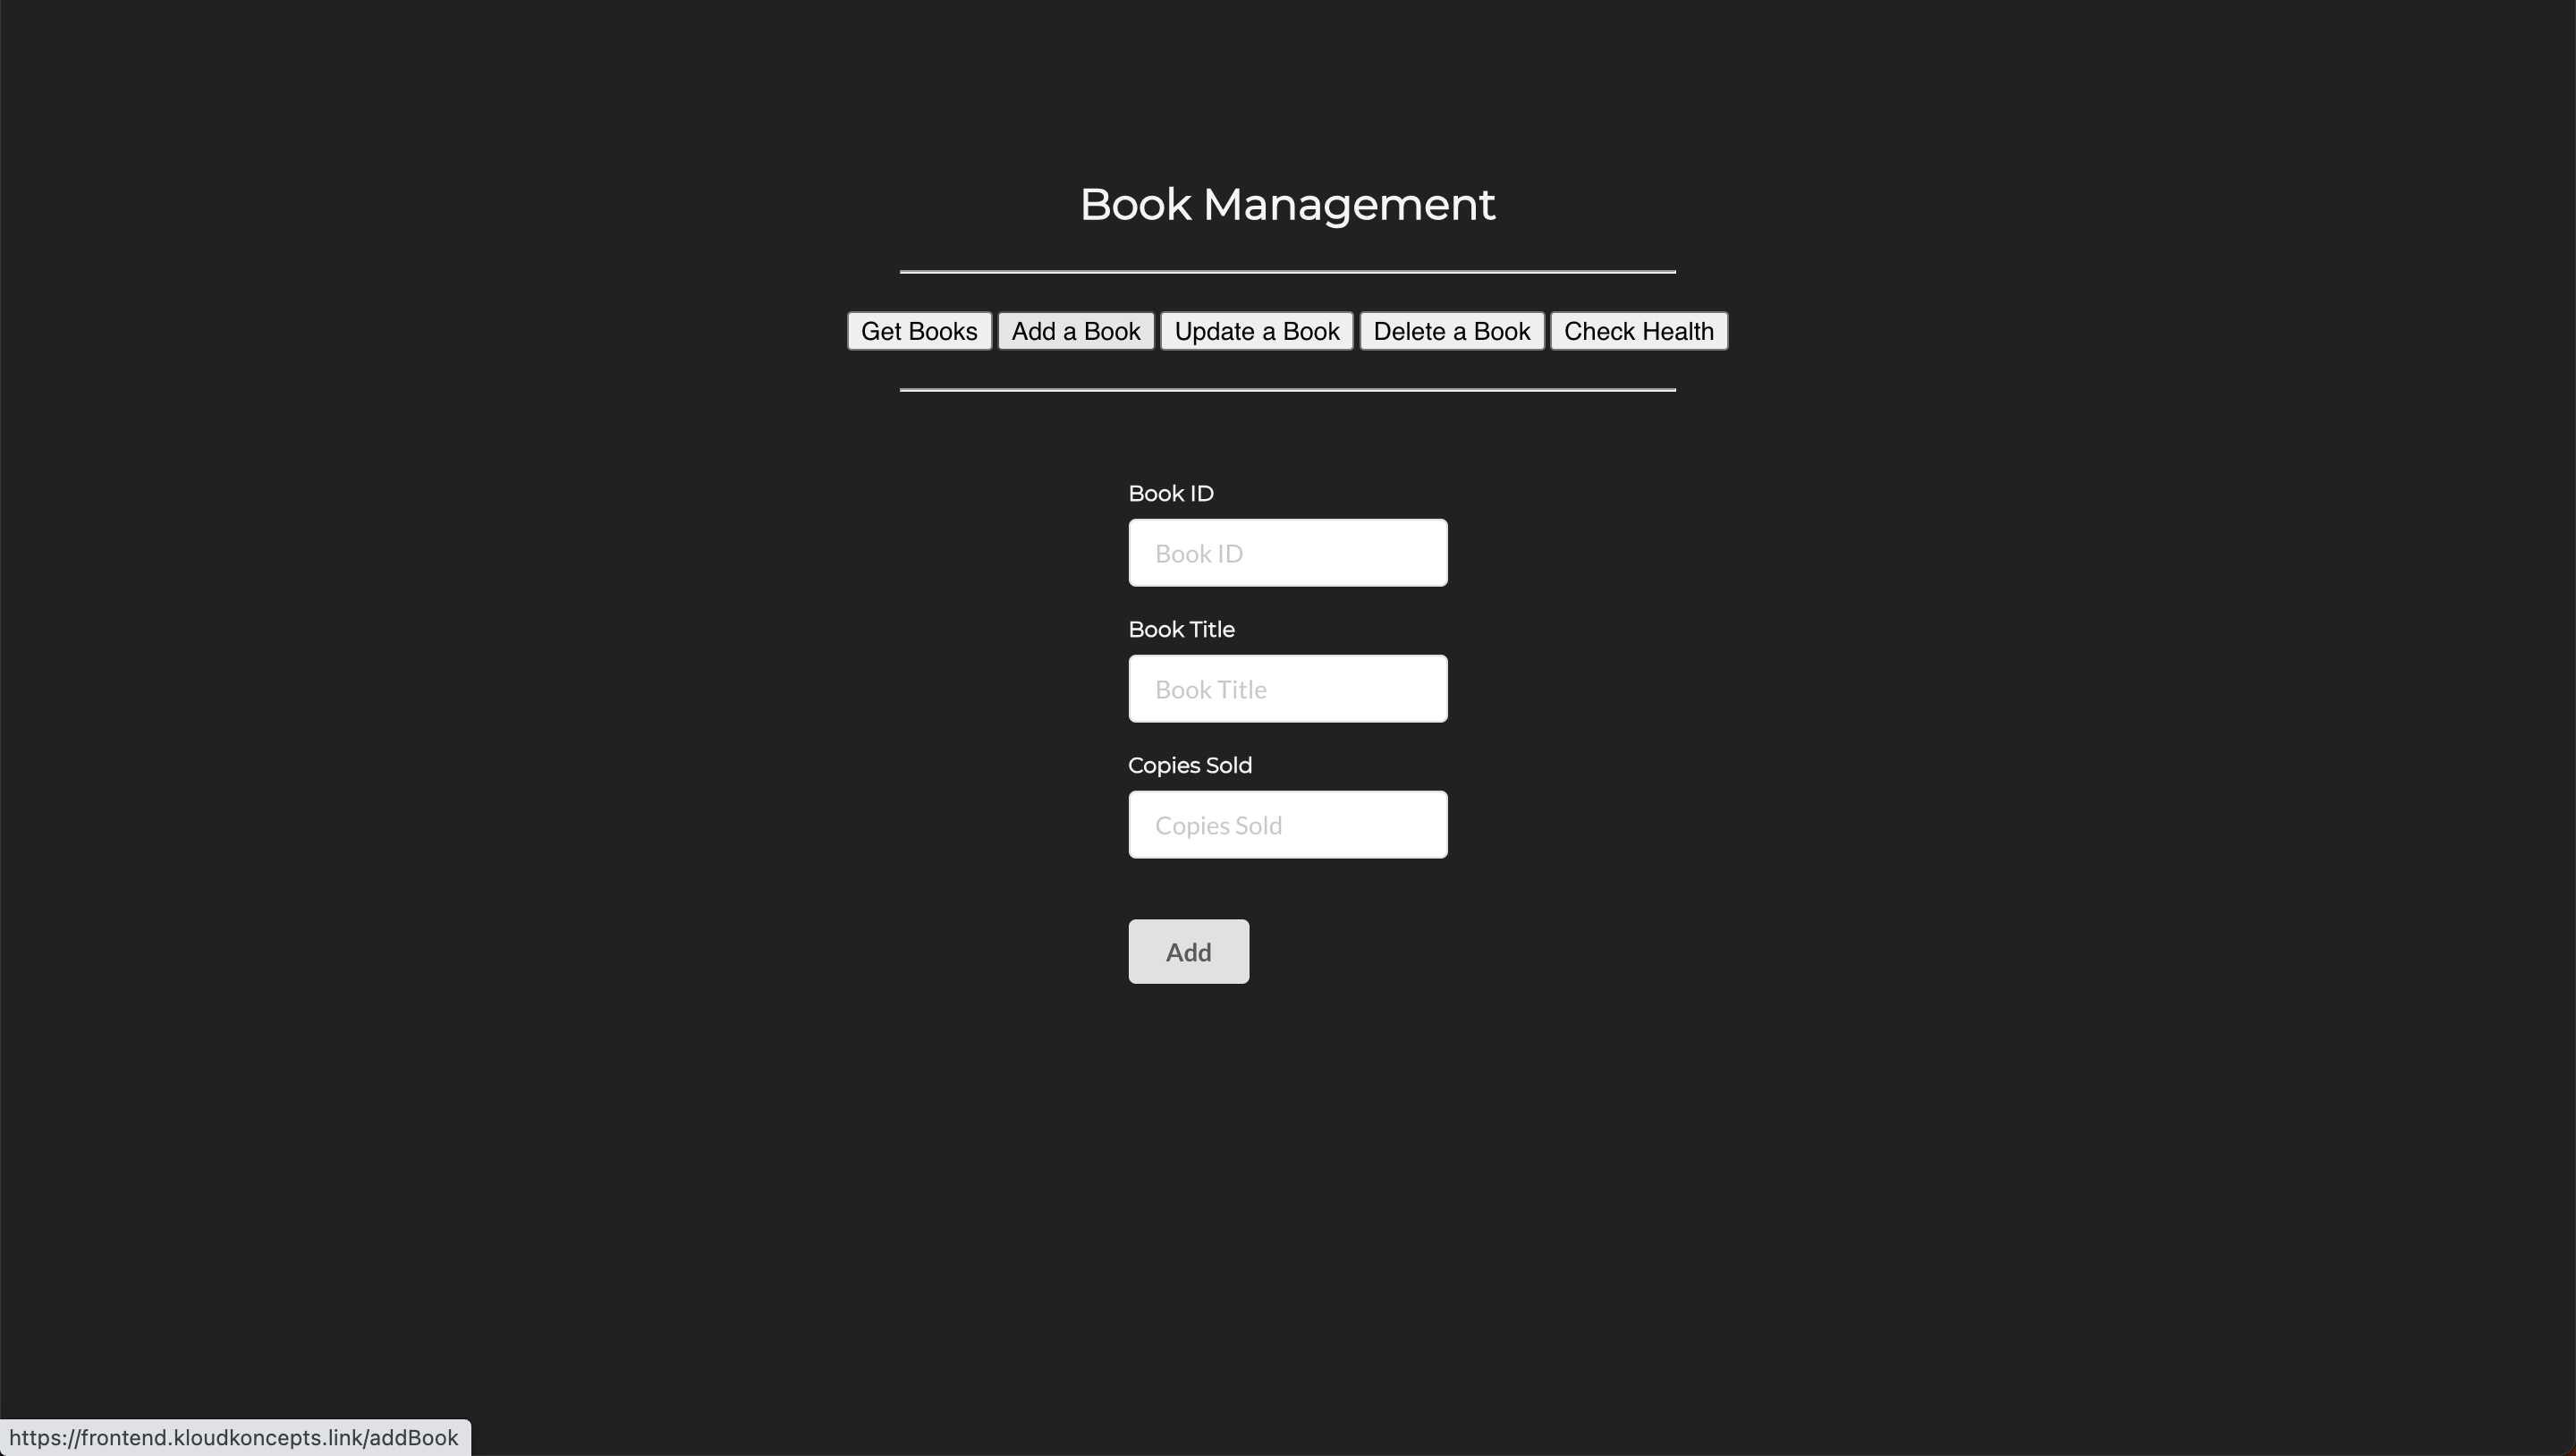
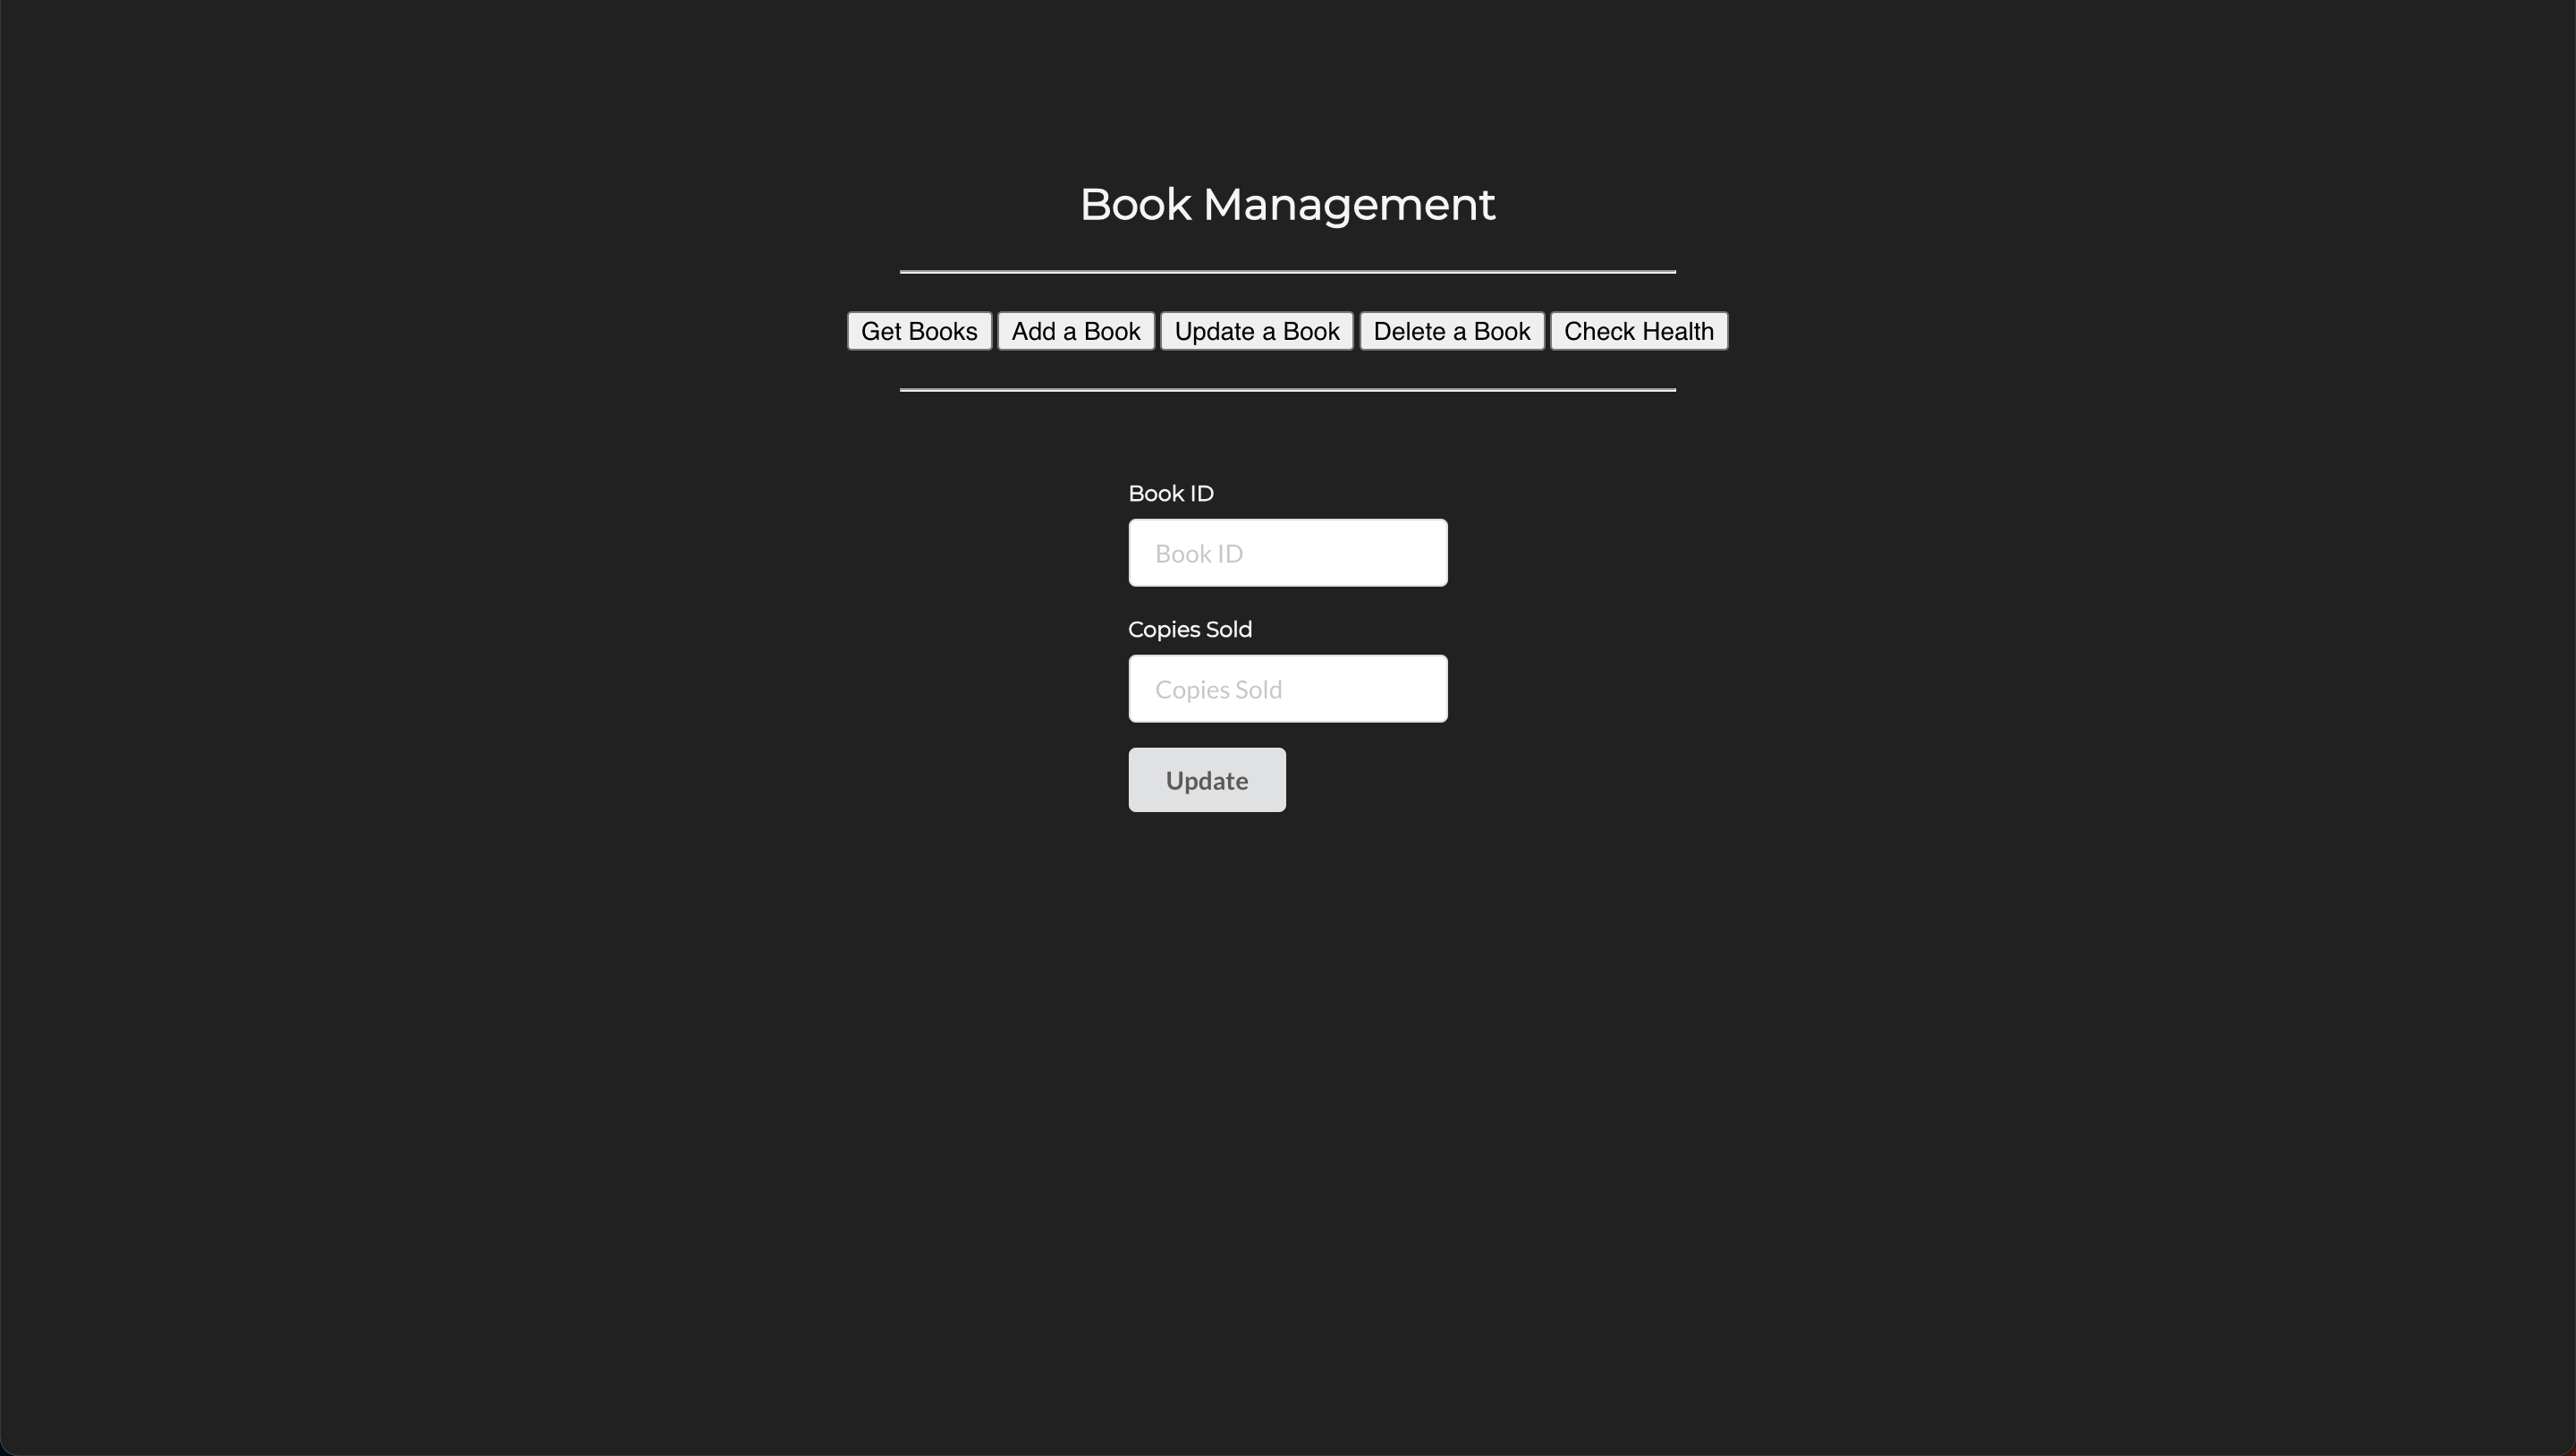
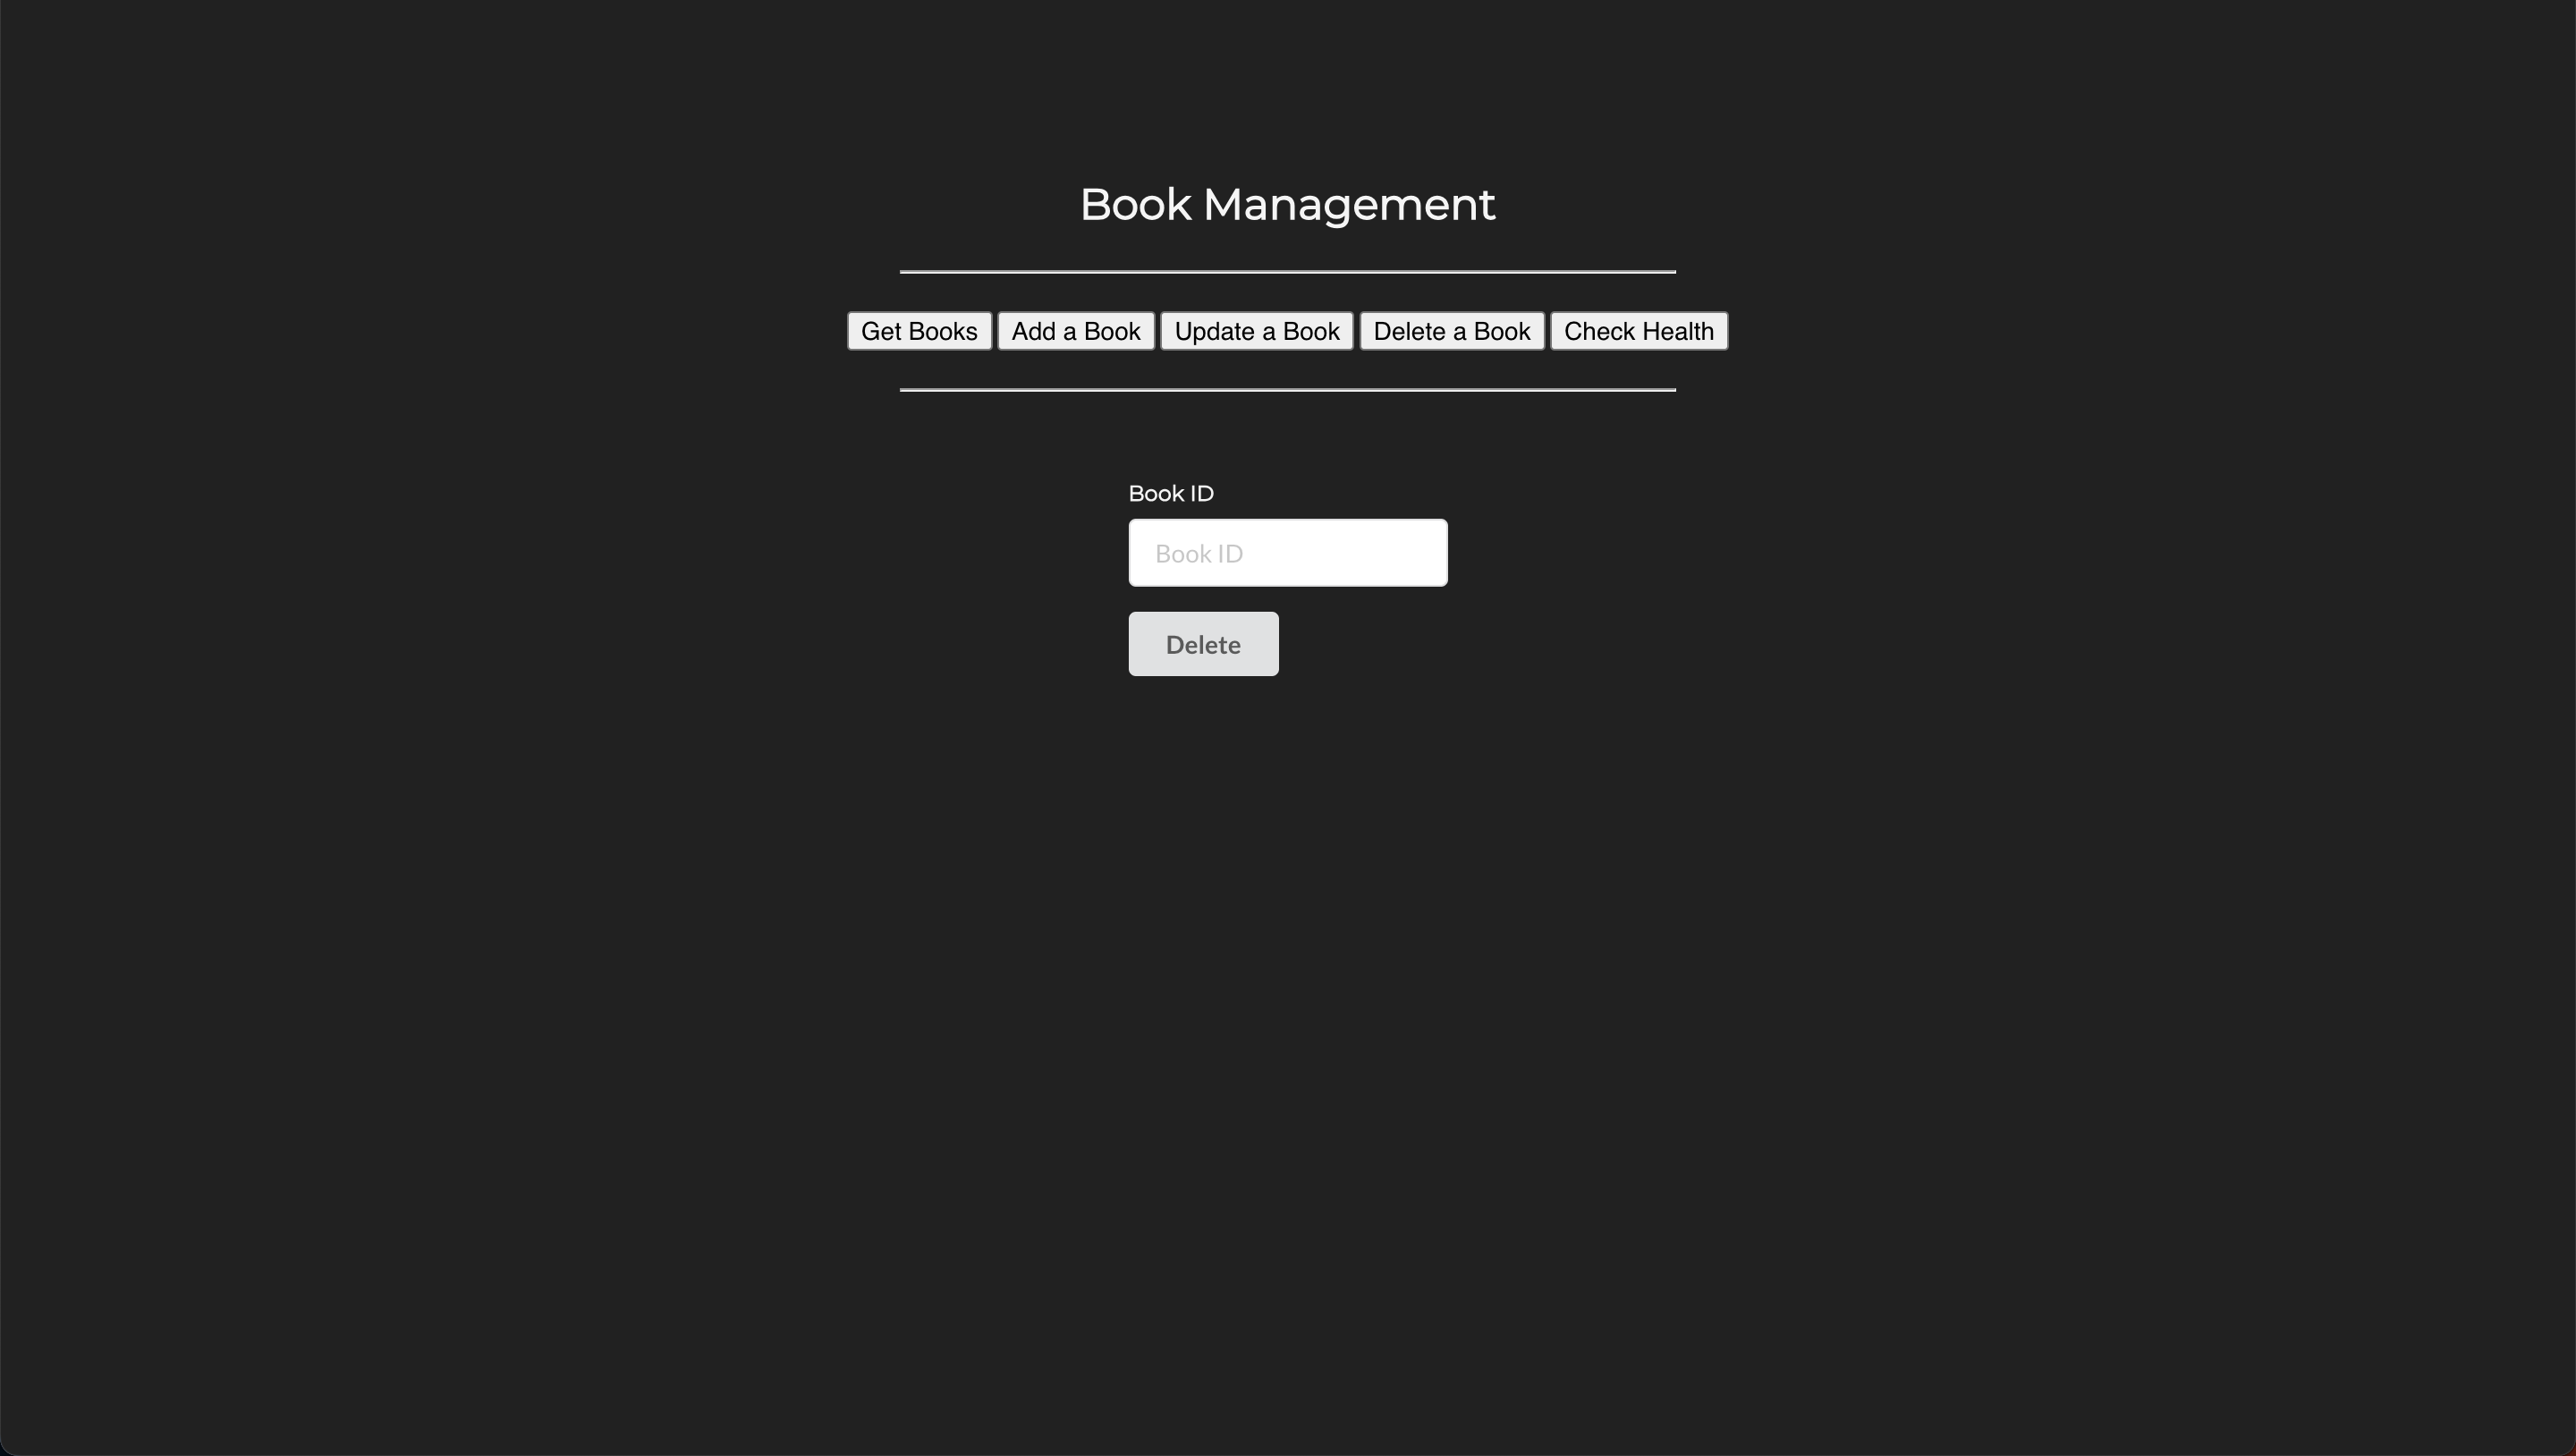
Open any browser on your local host machine and hit the URL to access the frontend service:
Step 4: Perform CRUD Operations and Verify Data in MongoDB
Access the frontend service from your browser and perform some CRUD operations as follows:
- Get Books
- Add a Book
- Update a Book
- Delete a Book
- Check Health

Verify if the records have been inserted into the MongoDB database:
# Start a shell session inside the mongodb container
kubectl exec -it <mongodb-pod-name> -n mongodb -- bash

# Start the mongo Shell to interact with MongoDB
mongo

# List Databases
show dbs

# Switch to mydb database
use mydb

# List collections
show collections

# List items in the books collection
db.books.find()
Clean Up
Assuming your folder structure looks like the one below:
|-- manifests
|   |-- mongodb
│   |   |-- 00-namespace.yml
│   |   |-- deployment-and-service.yml
│   |   |-- storageclass.yml
│   |   |-- pvc.yml
|   |-- backend
│   |   |-- 00-namespace.yml
│   |   |-- deployment-and-service.yml
│   |   |-- ingress.yml
|   |-- frontend
│   |   |-- 00-namespace.yml
│   |   |-- deployment-and-service.yml
│   |   |-- ingress.yml
Let's delete all the resources we created:
All AWS resources, such as load balancers, Route 53 records, etc., created by AWS Load Balancer Controller via ingress or service objects, will also be deleted.
References:
!!! quote "" * Kubernetes Resource Creation Order